> ## Documentation Index
> Fetch the complete documentation index at: https://docs.loadforge.com/llms.txt
> Use this file to discover all available pages before exploring further.
# Debug Logging
> How to log and analyze debug information in LoadForge.
When running load tests, it's often essential to capture debug information to understand what's happening during test execution. LoadForge provides a simple way to log debug information that appears in your test results.
Debug logs can help you identify issues with your test scripts, track request flows, and validate data handling during test execution.
## Using Print Statements
The simplest way to log debug information in LoadForge is by using Python's standard `print()` function in your Locustfile. These print statements are captured and displayed in the "Errors & Logs" section of your test results.
### Basic Logging Example
```python theme={null}
from locust import HttpUser, task, between
class QuickstartUser(HttpUser):
wait_time = between(1, 5)
@task
def view_home(self):
r = self.client.get("/")
print(f"view_home: status={r.status_code}")
```
This example logs the status code of each request to the home page, helping you verify that requests are succeeding.
### Logging Request Details
You can log more detailed information about requests and responses:
```python theme={null}
from locust import HttpUser, task, between
import json
class ApiUser(HttpUser):
wait_time = between(1, 3)
@task
def get_products(self):
with self.client.get("/api/products", catch_response=True) as response:
try:
data = response.json()
print(f"Products API: status={response.status_code}, count={len(data['products'])}")
if len(data['products']) == 0:
print("WARNING: Products API returned empty list")
response.failure("Empty product list")
except json.JSONDecodeError:
print(f"ERROR: Invalid JSON response: {response.text[:100]}...")
response.failure("Invalid JSON")
```
This example logs the status code and product count from an API response, with additional warnings for empty results or invalid JSON.
## Logging Conditional Information
You can use conditional logic to only log information when certain conditions are met:
```python theme={null}
from locust import HttpUser, task, between
import random
class ShoppingUser(HttpUser):
wait_time = between(2, 5)
def on_start(self):
# Log user initialization
self.user_id = random.randint(1000, 9999)
print(f"Initializing user {self.user_id}")
@task(3)
def browse_products(self):
category_id = random.randint(1, 5)
r = self.client.get(f"/products?category={category_id}")
# Only log slow responses
if r.elapsed.total_seconds() > 1.0:
print(f"SLOW REQUEST: /products?category={category_id} took {r.elapsed.total_seconds():.2f}s")
@task(1)
def add_to_cart(self):
product_id = random.randint(1, 100)
r = self.client.post("/cart", json={"product_id": product_id, "quantity": 1})
# Log all cart operations
print(f"Cart operation: Added product {product_id}, status={r.status_code}")
```
This example logs initialization information, selectively logs slow requests, and logs all cart operations.
## Advanced Logging Techniques
### Logging with Context
You can create more structured logs by including context information:
```python theme={null}
from locust import HttpUser, task, between
import time
class ComplexUser(HttpUser):
wait_time = between(1, 3)
def __init__(self, *args, **kwargs):
super().__init__(*args, **kwargs)
self.session_id = f"session_{int(time.time())}_{id(self)}"
def log(self, message):
"""Custom logging with session context"""
print(f"[{self.session_id}] {message}")
@task
def multi_step_process(self):
# Step 1: Start process
self.log("Starting multi-step process")
# Step 2: Get data
r1 = self.client.get("/api/data")
if r1.status_code != 200:
self.log(f"Failed to get data: {r1.status_code}")
return
# Step 3: Process data
data_id = r1.json().get('id')
self.log(f"Processing data_id={data_id}")
# Step 4: Submit result
r2 = self.client.post("/api/process", json={"data_id": data_id})
self.log(f"Process result: status={r2.status_code}")
```
This example creates a custom logging method that includes session context, making it easier to track the flow of individual virtual users.
## Viewing Logs in Test Results
After your test run completes, all print statements are collected and displayed in the "Errors & Logs" section of your test results. This provides valuable insights into what happened during the test execution.
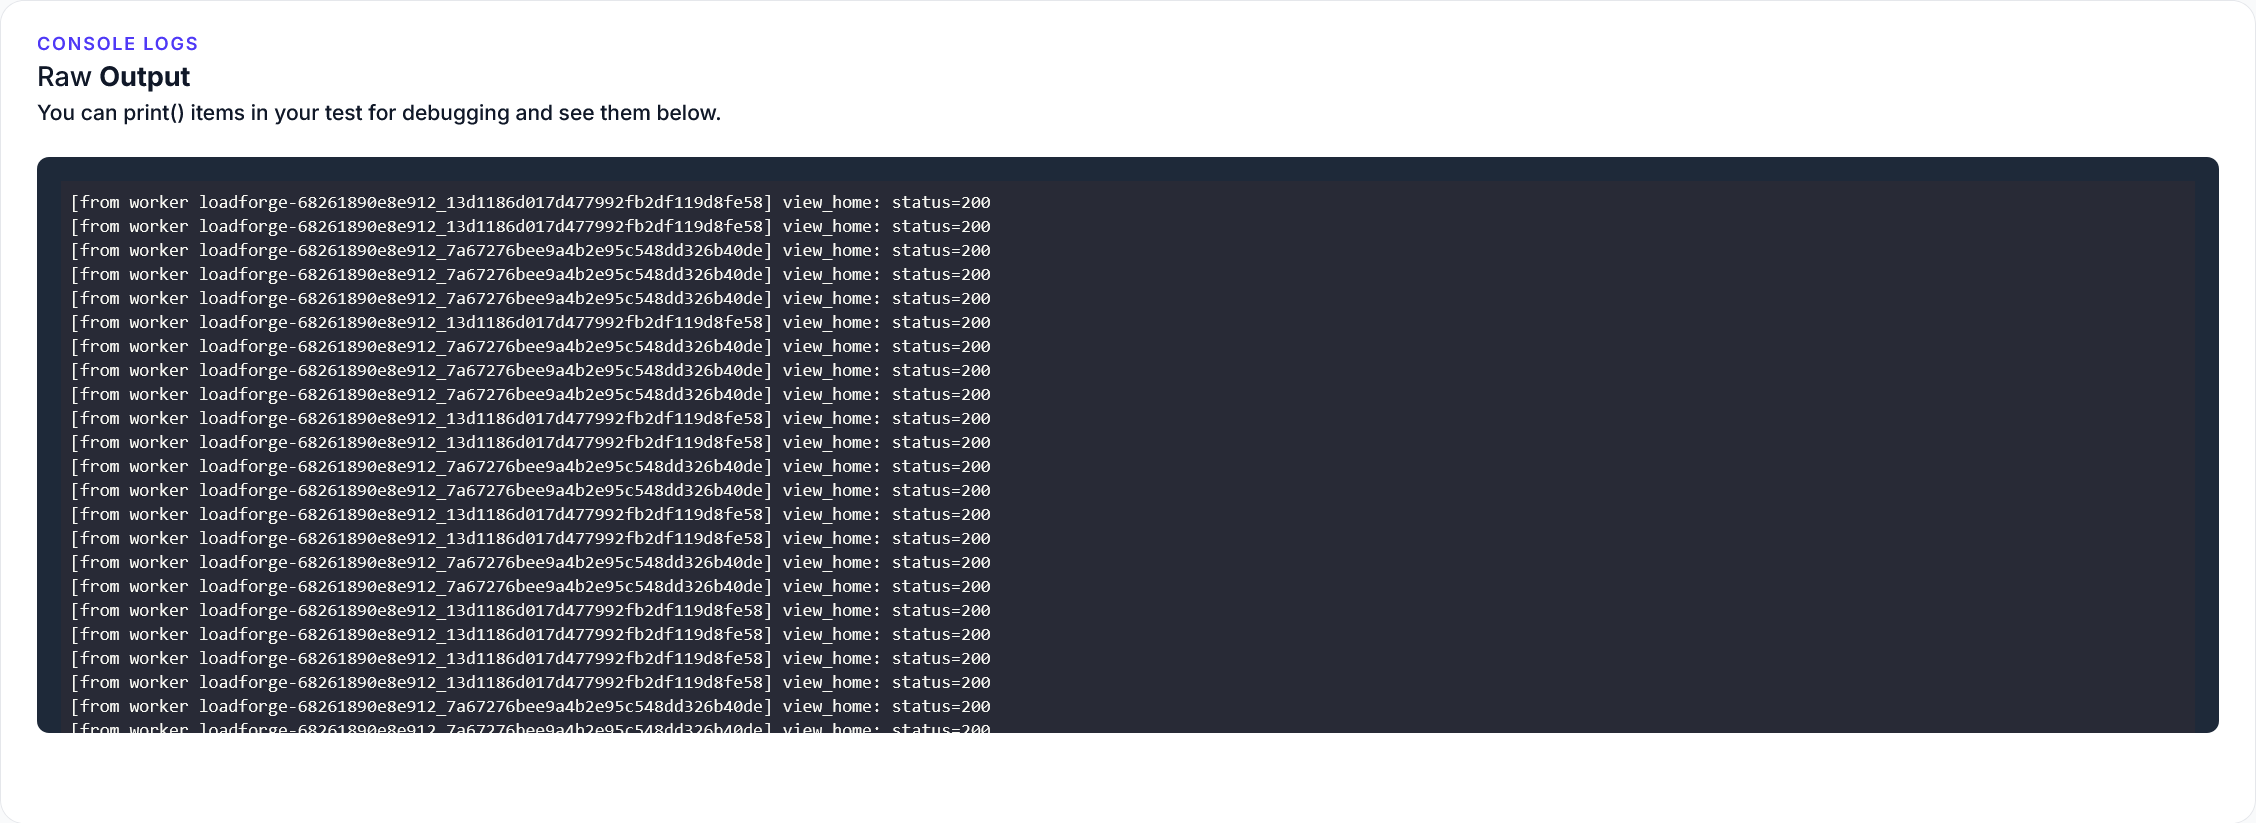 Logs are collected from all workers and aggregated in the final report. This means you can see debug information from all virtual users across all LoadForge workers.
## Best Practices for Logging
1. **Be Selective**: Log only important information to avoid overwhelming the logs
2. **Include Context**: Add timestamps, user IDs, or request identifiers to correlate logs
3. **Format Consistently**: Use a consistent format for logs to make them easier to scan
4. **Log Failures**: Always log details when errors or unexpected conditions occur
5. **Use for Debugging**: Remove or reduce logging in production tests to improve performance
Excessive logging can impact test performance. Use logging judiciously, especially in high-volume tests.
## Next Steps
Learn more about debugging LoadForge test scripts
Understand how to interpret your test results
Logs are collected from all workers and aggregated in the final report. This means you can see debug information from all virtual users across all LoadForge workers.
## Best Practices for Logging
1. **Be Selective**: Log only important information to avoid overwhelming the logs
2. **Include Context**: Add timestamps, user IDs, or request identifiers to correlate logs
3. **Format Consistently**: Use a consistent format for logs to make them easier to scan
4. **Log Failures**: Always log details when errors or unexpected conditions occur
5. **Use for Debugging**: Remove or reduce logging in production tests to improve performance
Excessive logging can impact test performance. Use logging judiciously, especially in high-volume tests.
## Next Steps
Learn more about debugging LoadForge test scripts
Understand how to interpret your test results