Getting Started in 3 Simple Steps
Step 1: Verify Your Host
Step 1: Verify Your Host
To ensure responsible use of LoadForge and prevent potential misuse like DoS attacks, you must verify website ownership:
- Add Your Host: Input your website’s URL
- Choose a Verification Method:
- DNS verification
- Meta tag insertion
- File upload
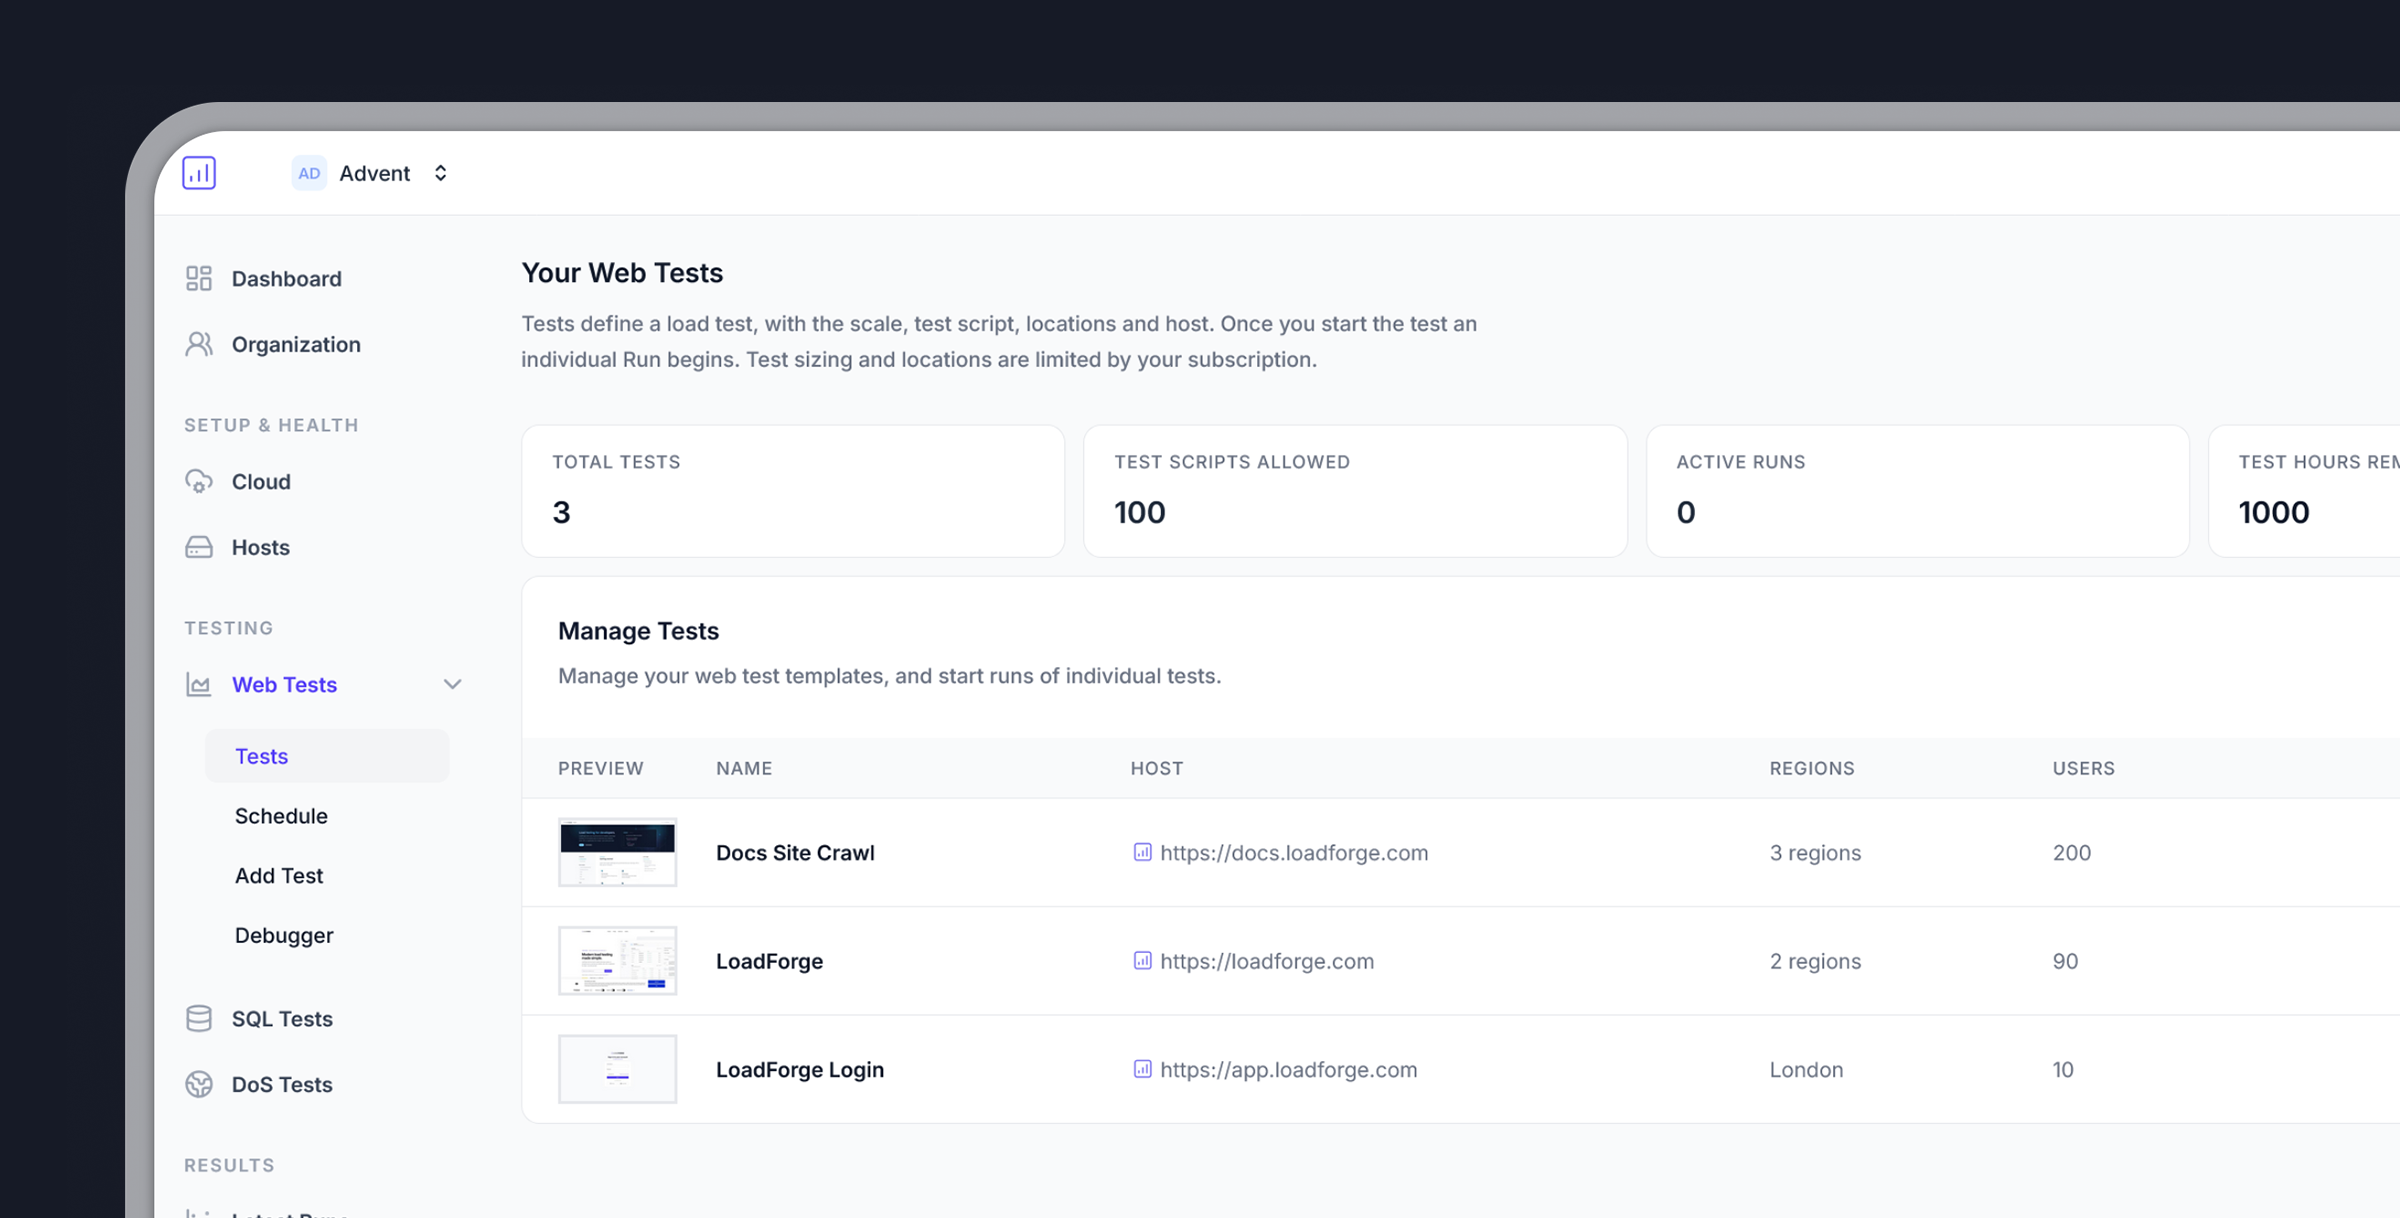
Step 2: Create Your Test
Step 2: Create Your Test
Once your host is verified, you’re ready to create a load test:
- Select Your Test File: For beginners, use the default test file
- Determine User Count: Start with 100 virtual users
- Choose Test Location: Select a server location close to your target audience
Default Test Script
Need More Advanced Testing?
- Browse test examples in our documentation
- Record your browser activities using the
.harformat - Use our test creation wizard for guided setup
Step 3: Run Your Test
Step 3: Run Your Test
Execute your test and analyze the results:
- Start the Test: Click the
Runbutton next to your test - Set Test Duration: For first tests, keep it brief (5 minutes)
- Monitor Real-time: Watch performance metrics as they happen
What’s Next?
After your first test completes, explore these resources:Analyzing Results
Learn how to interpret your test results and identify optimization opportunities
Advanced Testing
Create custom test scenarios to simulate real-world user behavior
Don't have an account yet?
Sign up for free and start load testing your application today.